

How I Repaired Our 20-Year-Old Refrigerator Instead of Buying a New One
Explore the incredible journey of our 20-year-old refrigerator, "Lazarus," and learn how we revived it with simple DIY repairs. From replacing the defrost heater to fixing the defrost timer board, we share practical tips and common refrigerator solutions to keep your appliance running smoothly. Perfect for homeowners looking to extend their fridge's lifespan and tackle common issues. Get expert advice and step-by-step guidance in this inspiring story of resilience and durability.
APPLIANCES
Fred Artisan
6/4/20245 min read
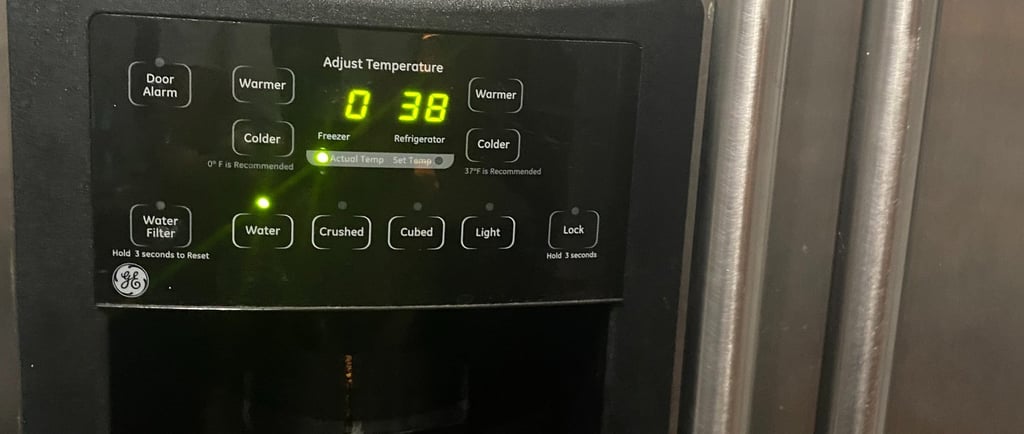
The Resurrection of Lazarus: Reviving Our 20-Year-Old Refrigerator
When our 20-year-old GE GSS23WSTA SS side-by-side refrigerator stopped cooling properly, replacing it seemed like the easiest solution. Instead, I diagnosed the problem, replaced the defrost heater and later the defrost timer board, and brought it back to life. These repairs saved us a significant amount of money and taught me that many refrigerator problems can be fixed with patience, basic tools, and the right replacement parts.
Introduction
Every home has an appliance that becomes part of the family.
For us, it was our GE side-by-side refrigerator.
After more than twenty years of faithful service, my wife gave it the nickname "Lazarus." Every time we thought its life was over, another repair brought it back into service.
Like many homeowners, my first reaction was to shop for a replacement. New refrigerators are packed with modern features, but they also come with a hefty price tag. Before spending thousands of dollars, I decided to investigate the problem myself.
That decision turned into one of the most rewarding DIY repairs I've ever completed.
Meet Lazarus
Our refrigerator is a GE GSS23WSTA SS side-by-side model that has served our family for over two decades.
Over the years it has handled birthdays, holidays, family gatherings, hurricanes, and everyday life without complaint. Like any hardworking appliance, however, age eventually began to catch up with it.
Instead of giving up, I decided to repair it one step at a time.
The First Warning Signs
Everything seemed normal until I noticed frost building up inside the freezer.
Soon afterward, the refrigerator compartment stopped cooling as efficiently as before. Food wasn't staying as cold, and the compressor seemed to run longer than normal.
Rather than guessing, I spent time researching the symptoms and learning how the refrigerator's defrost system worked.
That research pointed me toward one common failure—the defrost heater.
Repair Number One: Replacing the Defrost Heater
The defrost heater melts frost from the evaporator coils during the automatic defrost cycle. When it fails, frost continues to build until airflow becomes restricted, making the refrigerator work much harder.
After disconnecting the power and removing the necessary panels, I replaced the old heater with a new one.
The repair took patience, but it wasn't complicated.
Once everything was reassembled and the refrigerator powered back on, normal cooling returned.
Lazarus had survived another challenge.
Years Later, Another Problem Appeared
Several years passed without any major issues.
Then one day I noticed the refrigerator wasn't maintaining a consistent temperature.
Instead of immediately replacing parts, I followed the same troubleshooting process I had learned during the first repair.
After checking the symptoms, I suspected the defrost timer board.
Fortunately, I had purchased one years earlier while ordering the heater.
Installing the replacement board solved the problem almost immediately.
Once again, our old refrigerator proved it still had plenty of life left.
What This Repair Taught Me
Many homeowners assume an older appliance should simply be replaced.
My experience taught me something different.
Small components often fail long before the refrigerator itself.
Replacing an inexpensive part can sometimes restore years of reliable service.
Taking time to diagnose the problem first can save a surprising amount of money.
That same approach has helped me during other home projects, including our bedroom renovation, repairing damaged drywall, removing an old popcorn ceiling, installing vinyl plank flooring, and repainting walls and ceilings. Every successful DIY project begins with understanding the problem before reaching for expensive solutions.
Common Refrigerator Problems
If your refrigerator is acting up, these are some of the most common issues to check.
Frost Buildup
A failed defrost heater, timer, or control board can allow frost to accumulate, restricting airflow and reducing cooling performance.
Temperature Changes
If food isn't staying cold or temperatures fluctuate throughout the day, the defrost system or airflow may need attention.
Water Leaks
A clogged defrost drain can cause water to collect beneath the refrigerator or inside the freezer.
Strange Noises
Dirty condenser coils, worn fan motors, or aging components can create unusual sounds that shouldn't be ignored.
Warm Refrigerator, Cold Freezer
This often points to restricted airflow or a faulty evaporator fan.
Maintenance Tips That Keep Refrigerators Running Longer
Over the years I've learned that regular maintenance is just as important as repairs.
To help your refrigerator last longer:
Clean the condenser coils at least twice each year.
Check the door seals for cracks or gaps.
Keep the refrigerator around 37°F and the freezer around 0°F.
Avoid blocking airflow with overcrowded shelves.
Listen for unusual sounds and investigate them early.
Clean dust from behind and underneath the appliance.
These simple habits can extend the life of almost any refrigerator.
The Tools That Made the Job Easier
Having the right tools made these repairs much less stressful.
I used a Phillips screwdriver, flat screwdriver, nut driver set, flashlight, and a digital multimeter to safely diagnose electrical components before replacing them. Comfortable work gloves protected my hands while working around metal panels, and replacing worn refrigerator parts restored proper operation. An inexpensive appliance cleaning brush also helped remove years of dust from the condenser coils, improving airflow and efficiency.
These are basic tools that continue to serve me well on many DIY Handymen projects around the house.
Was Repairing It Worth It?
Absolutely.
Instead of spending thousands of dollars on a replacement refrigerator, I invested in a few replacement parts and several hours of my time.
The reward wasn't just financial.
I gained confidence, learned more about appliance repair, and extended the life of an appliance that still serves our family every day.
Sometimes repairing what you already own is the smartest investment you can make.
Safety Reminder
Always unplug the refrigerator before beginning any repair.
Wear safety gloves, work carefully around electrical components, and consult the service manual whenever possible.
If you are uncomfortable performing electrical repairs, contact a qualified appliance technician.
No repair is worth risking your safety.
Frequently Asked Questions
Is it worth repairing a 20-year-old refrigerator?
If the compressor is healthy and the repair cost is reasonable, repairing an older refrigerator can be an excellent investment.
What usually causes frost buildup?
The most common causes include a failed defrost heater, defective timer or control board, or problems within the defrost system.
Can homeowners replace a defrost heater?
Many can with basic tools and careful preparation. Always disconnect power before working on any appliance.
How long should a refrigerator last?
Most refrigerators last between 10 and 20 years, but with regular maintenance and timely repairs, many continue operating well beyond that.
Final Thoughts
Our refrigerator earned the nickname Lazarus because it refused to quit.
Every repair reminded me that fixing a problem is often more rewarding than replacing it. Whether you're troubleshooting a refrigerator, renovating a bedroom, repairing drywall, installing new flooring, or tackling another home improvement project, taking the time to understand the problem usually leads to the best solution.
I hope our story encourages you to give your appliances a second chance before deciding they're beyond repair.
If you enjoy practical home repairs, maintenance tips, and real DIY experiences, explore more guides here on DIY Handymen. My goal is simple—share honest projects, practical solutions, and lessons learned so you can save money, build confidence, and keep your home running smoothly, one repair at a time.