How to Remove Carpet Staples from a Concrete Floor: What I Learned During My Bedroom Renovation
Learn how I removed hundreds of carpet staples from a concrete floor during my bedroom renovation. Discover the tools I used, safety tips, common mistakes to avoid, and how proper floor preparation can make your next flooring project easier.
HOME IMPROVEMENT PROJECTS
Fred Artisan
7/1/20263 min read
How to Remove Carpet Staples from a Concrete Floor: What I Learned During My Bedroom Renovation
Removing old carpet is usually the easy part. What many homeowners don't realize is that hundreds of carpet staples can remain embedded in the concrete floor after the carpet and padding are gone.
During my bedroom renovation, I quickly learned that removing carpet staples from a concrete floor required patience, the right tools, and a good safety plan. The work was not difficult, but it was time-consuming and messy.
If you're preparing a room for new flooring, here's what I learned from doing the job myself.
Why Carpet Staples Must Be Removed
After removing carpet and padding, many homeowners are tempted to leave the staples behind. This is a mistake.
Old staples can:
Prevent new flooring from sitting flat
Damage vapor barriers
Create bumps under vinyl plank flooring
Cause injuries during installation
Interfere with proper floor preparation
Taking the time to remove them now can save headaches later.
Tools I Used
For this project, I used simple hand tools:
You may already have most of these tools in your garage or workshop.
Safety Comes First
One thing I quickly discovered was that old carpet hides a lot of surprises.
Under the carpet and padding, I found years of accumulated dirt and dust. Depending on the age of the home, you may also encounter:
Mold or mildew
Pet hair
Insect debris
Broken staples
Sharp nails
Wood splinters
Before starting, I strongly recommend:
Wearing work gloves
Wearing safety glasses or goggles
Using a dust mask
Wearing long pants
Using closed-toe shoes
Take your time and work carefully. A rushed job can easily lead to cuts, splinters, or eye injuries.
Step 1: Remove the Carpet and Padding
Before tackling the staples, remove all carpet and padding from the room.
If you're still in this stage, check out my related article:
How I Removed Old Carpet, Padding, and Tack Strips From My Bedroom Floor
Removing everything first gives you a clear view of the concrete slab and allows you to identify all remaining staples.
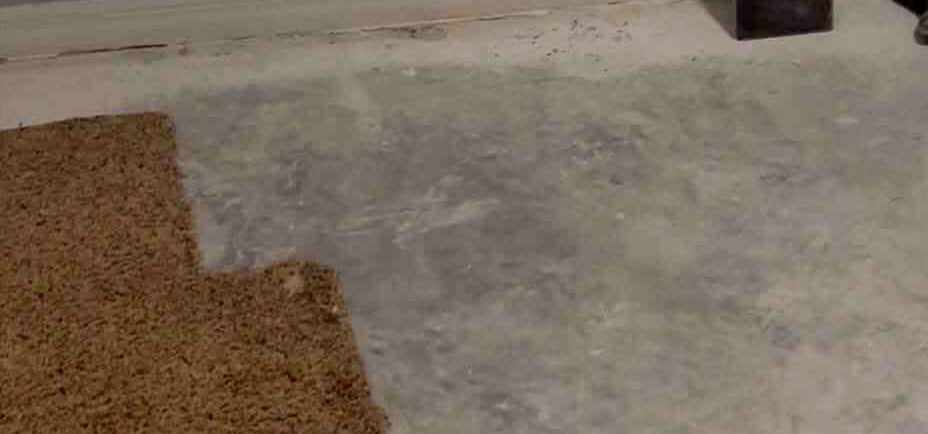
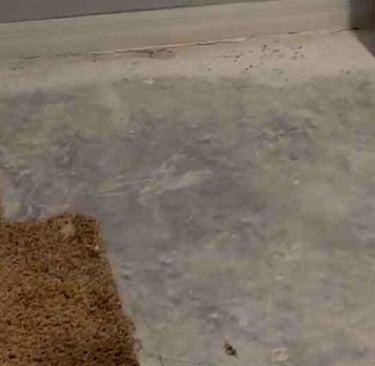
Step 2: Inspect the Floor
Once the carpet is gone, walk the room slowly and inspect the concrete floor.
You may find:
Rows of staples
Individual staples scattered throughout the room
Tack strips along the walls
Nails embedded in the concrete
This is a good time to vacuum loose debris before starting staple removal.
Step 3: Remove the Tack Strips
Before removing staples, remove any remaining tack strips around the perimeter of the room.
I used a pry bar to carefully lift the strips away from the concrete.
Be prepared for some resistance.
In my case, several tack-strip nails chipped small pieces of concrete during removal. This is fairly common and can usually be addressed during floor preparation.
Work slowly to avoid unnecessary damage.
Step 4: Remove the Carpet Staples
This part took longer than expected.
I used a combination of:
Hammer claw
Painter's tool
Pry bar
The goal was to get underneath each staple and gently lift it out of the concrete.
Some staples came out easily.
Others were stubborn and required multiple attempts.
Instead of rushing, I found it easier to work in small sections and gradually move across the room.
A steady approach helped reduce frustration and prevented accidental damage to the concrete floor.
Step 5: Clean Up as You Go
One lesson I learned quickly was that cleanup is part of the job.
Every few minutes, I stopped to:
Pick up removed staples
Remove loose nails
Collect wood fragments
Vacuum dust and debris
This helped keep the work area safe and made it easier to see remaining staples.
Leaving sharp metal pieces on the floor can easily lead to injuries.
Common Mistakes to Avoid
Rushing the Job
Removing staples is not exciting work.
However, skipping staples or rushing through the process can create problems later during flooring installation.
Forgetting Safety Equipment
Old flooring materials can contain years of dust and debris.
Always wear gloves, eye protection, and a dust mask.
Ignoring Concrete Damage
Small chips and imperfections may appear after removing tack strips.
Inspect the slab carefully before installing new flooring.
Leaving Staples Behind
Even a few missed staples can interfere with new flooring materials.
Take time to inspect the entire room once the work is complete.
Was Removing Carpet Staples Difficult?
Not really.
The work was straightforward, but it required patience.
For me, the biggest challenge was not removing the staples themselves. The challenge was staying focused, working safely, and making sure every staple was removed before moving on to the next stage of the renovation.
Final Thoughts
Removing carpet staples from a concrete floor may not be the most exciting part of a renovation project, but it is one of the most important.
A clean, smooth concrete slab creates the foundation for everything that comes next.
During my bedroom renovation, I learned that preparation often takes longer than installation. Taking the time to remove every staple, clean the floor properly, and work safely made the rest of the project much easier.
In the next stage of my renovation, I focused on cleaning and preparing the concrete slab before installing new flooring.
Related Articles:
✅ Bedroom Renovation Cost Breakdown: What I Spent and What I Learned
✅ How I Removed Old Carpet, Padding, and Tack Strips From My Bedroom Floor