Cleaning and Preparing a Concrete Slab for New Flooring: A DIY Guide Before Installation
Learn how to clean, inspect, repair, and prepare a concrete slab before installing new flooring. Follow my real bedroom renovation experience with practical tips, common mistakes to avoid, and essential preparation steps for a smooth, long-lasting floor.
Fred Artisan
7/8/20264 min read
Cleaning and Preparing a Concrete Slab for New Flooring: What I Learned During My Bedroom Renovation
After removing the carpet, padding, tack strips, and hundreds of staples from my bedroom, I thought the hard part was over.
I was wrong.
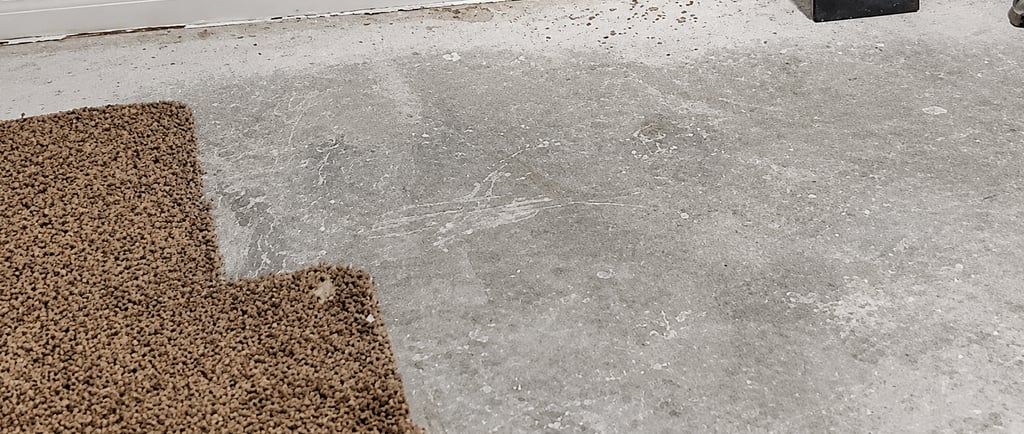
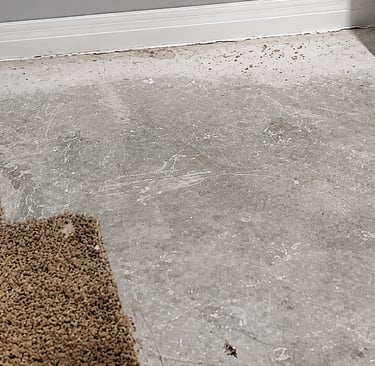
Removing the old flooring was only the beginning. What was left behind was a concrete slab that had probably been hidden for decades. It was covered with dust, dirt, tiny concrete chips, and years of debris. Before I could even think about installing a vapor barrier or vinyl plank flooring, I had to make sure the concrete was clean, solid, and ready.
Looking back, this preparation stage became one of the most important parts of my entire bedroom renovation.
You Never Know What's Waiting Under an Old Carpet
Every home is different.
Once the carpet and padding are gone, you may discover years of accumulated dust, dirt, mildew caused by trapped moisture, insect remains, stains, or adhesive residue. Some areas may look perfectly clean, while others reveal problems you never knew existed.
This is why I strongly recommend wearing:
Old carpet can release a surprising amount of dust into the air, and protecting yourself should always come first.
Cut the Carpet Into Smaller Pieces
One lesson I learned quickly was not to remove the carpet in one large roll.
Old carpet becomes incredibly heavy, especially after years of collecting dust and dirt. Large rolls are difficult to carry, awkward to handle, and often won't fit inside a standard garbage bin.
Instead, I cut both the carpet and the padding into smaller sections before rolling them up. They were much easier to carry, easier to dispose of, and made the cleanup process much less exhausting.
Expect to Clean More Than Once
I found myself constantly sweeping, vacuuming, and cleaning throughout the project.
Every step created another layer of dust.
Removing tack strips.
Pulling staples.
Scraping the floor.
Repairing small chips.
Each task left more debris behind.
Don't expect one quick sweep to finish the job. I vacuumed the room several times before I finally felt confident that the floor was ready for the next stage.
Remove Every Tack Strip, Staple, and Concrete Nail
This part takes patience.
Even after I thought I had removed everything, I kept finding another staple or concrete nail hiding along the walls.
Take your time.
Walk around the room carefully.
Look from different angles.
Run a scraper or putty knife across the surface to help locate anything sticking up.
Missing just one staple or concrete nail can damage the vapor barrier or create problems when installing vinyl plank flooring.
Don't Be Surprised if the Concrete Chips
As I removed the tack strips, small pieces of concrete chipped away.
This is common, especially in older homes.
Most of the damage was minor, but I didn't ignore it.
I filled small chips, nail holes, and damaged spots with a concrete patching compound, then allowed everything to dry before continuing.
Taking a few extra minutes now can help create a smoother foundation for your finished floor.
Check the Floor Before Moving Forward
Once the slab was finally clean, I used the opportunity to inspect the room carefully.
I checked for:
Uneven areas
Low spots
High spots
Small cracks
Moisture concerns
Loose debris
Finding these issues now is much easier than discovering them after the new flooring has already been installed.
Visualize the Flooring Layout
Before opening every box of flooring, I placed several vinyl planks on the concrete without locking them together.
This simple step helped me visualize the finished room.
It also allowed me to decide:
Which direction the planks should run.
Where to begin the first row.
Whether the last row would end up too narrow.
If any adjustments were needed before installation.
Planning ahead can save time, reduce waste, and produce a better-looking floor.
Measure One More Time
Even if you've already measured your room, measure it again.
Walls are not always perfectly straight or square.
A second measurement helps confirm your flooring layout and gives you one last chance to make adjustments before installation begins.
My Biggest Lesson
If there's one thing this renovation taught me, it's this:
Don't rush the preparation.
Installing new flooring is the exciting part, but everything depends on what happens underneath it.
A clean, level, dry, and properly prepared concrete slab gives your new floor the best chance to last for many years.
Taking the extra time now is much easier than fixing problems after the flooring is installed.
Final Thoughts
Cleaning and preparing the concrete slab may not be the most exciting part of a bedroom renovation, but it is one of the most important.
Every sweep of the broom, every pass with the shop vacuum, every missed staple you find, and every small repair you make improves the foundation for the work that follows.
Looking back, I'm glad I didn't rush this step. It gave me confidence that when it was finally time to install the vapor barrier and vinyl plank flooring, I was starting with the best possible surface.
Related DIY Handymen Articles
Continue following my bedroom renovation journey:
Bedroom Renovation Cost Breakdown: What I Spent and What I Learned
How I Removed Old Carpet, Padding, and Tack Strips From My Bedroom Floor
How to Remove Carpet Staples from a Concrete Floor: What I Learned During My Bedroom Renovation
Tools & Materials Used
Concrete floor scraper (if adhesive residue is present)
Moisture meter (optional, but recommended before installing a vapor barrier)
If you're planning a similar renovation, purchasing quality tools can save time, improve safety, and make the job much easier. Recommend only tools you have personally used or thoroughly researched, and always disclose affiliate relationships where required.